A week ago I discovered this wonderful food blog,
Annie's Eats, on Pinterest. My friend Cammie pinned her post on freezer meals and I was hooked! I've been trying to find recipes other than casseroles to prepare before baby Autumn arrives in late May. Well needless to say I ended up spending 5 hours last Thursday preparing freezer meals. I decided to start with her
Chicken Gyros,
Whole Wheat Pita Bread,
The Perfect Hamburger,
The Perfect Burger Bun, and
White Bean Chicken Chili.
All the work was well worth it, but being pregnant and on my feet in the kitchen after work was not good for my back. In the future I plan to double and triple recipes rather than make multiple recipes all at once.
So far I've tried the White Bean Chicken Chili and the Perfect Hamburger (with Perfect Bun). Both of them were great, especially the Perfect Bun (which is a light brioche bun). I also really enjoyed packing the chili for lunch this week, but Kyle thought it resembled too much of a soup (he's not really a soup guy). I didn't mind the consistency, but in the future I will probably double the amount of beans.
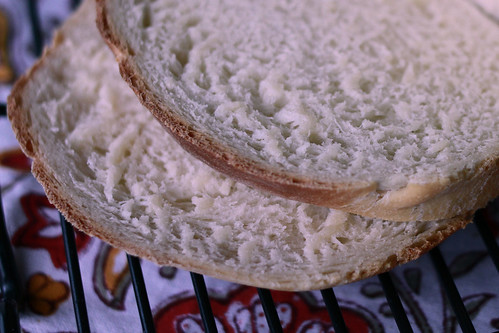
Anyways, I digress. This post is about some homemade American Sandwich Bread. Ever since making the buns and pitas I'm now on a bread/roll/bun making kick. You just can't beat the taste and satisfaction of homemade bread.
I was drawn to this particular recipe because I had all of the ingredients on hand. It came together rather quickly and I LOVE that the dough cooperated with me. I typically find bread recipes a challenge because the dough is either too sticky or too dry, but with the purchase of a kitchen scale that has all changed. I weighed the amount of all purpose flour and didn't need to follow the extra step of adding flour after the 10 minute knead process in the mixer.
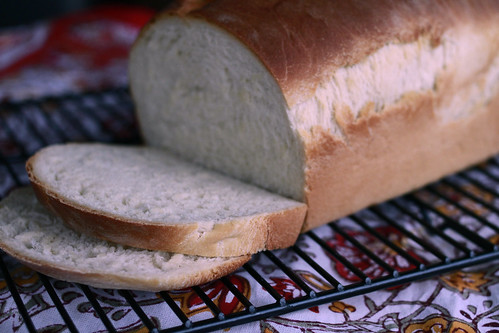
I will definitely be making this bread again and I plan to store the slices in the freezer for a quick sandwich, grilled cheese, or some toast (if it's not all gone by Sunday!).
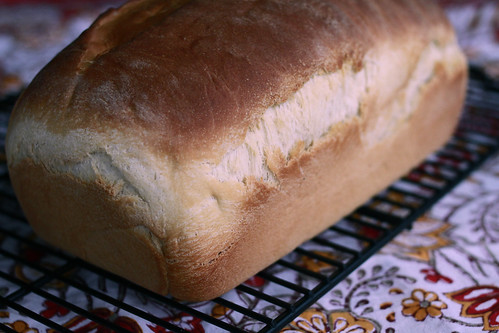
 American Sandwich Bread
Makes 1 loaf
Approximate cook time is 2 hours and 15 minutes (includes prep, rise, and bake time)
Ingredients:
3 ¾ cups all-purpose flour (18 ¾ oz.)
2 tsp. salt
1 cup warm whole milk (about 110°)
1/3 cup warm water (about 110°)
2 tbsp. unsalted butter, melted
3 tbsp. honey
1 envelope (about 2 ¼ tsp.) instant yeast
Directions:
Adjust an oven rack to the lowest position and heat the oven to 200°. Once the oven temperature reaches 200°, maintain the heat for 10 minutes, then turn off the oven.
Mix 3 ½ cups of the flour and the salt in the bowl of a stand mixer fitted with the dough hook. Mix the milk, water, butter, honey and yeast in a liquid measuring cup. Turn the machine to low and slowly add the liquid. When the dough comes together, increase the speed to medium and mix until the dough is smooth and satiny, stopping the machine two or three times to scrape dough from the hook, if necessary, about 10 minutes. (After 5 minutes of kneading, if the dough is still sticking to the sides of the bowl, add flour 1 tablespoon at a time and up to ¼ cup total, until the dough is no longer sticky.) Turn the dough onto a lightly floured work surface; knead to form a smooth, round ball, about 15 seconds.
Please note that a medium mixing speed in your stand mixer will sound pretty violent. After 5 minutes of running I heard a loud thump and the mixer actually fell on the floor (I know!). The mixer was close to the edge of the counter, but my recommendation is to push as far back as possible. I also decreased the speed for the last 5 minutes down to medium-low and the bread still tasted fantastic.
Place the dough in a very lightly oiled large bowl, rubbing the dough around the bowl to coat lightly. Cover the bowl with plastic wrap and place in the warmed oven until the dough has doubled in size, about 40-50 minutes.
On a floured work surface, gently press the dough into a rectangle 1 inch thick and no longer than 9 inches. With a long side facing you, roll the dough firmly into a cylinder, pressing with your fingers to make sure the dough sticks to itself. Turn the dough seam-side up and pinch it closed. Place the dough seam-side down in a greased 9×5-inch loaf pan and press it gently so it touches all four sides of the pan. Cover with plastic wrap; set aside in a warm spot until the dough almost doubles in size, 20-30 minutes.
Keep one oven rack at the lowest position and place the other at the middle position and heat the oven to 350°. Place an empty baking pan on the bottom rack. Bring two cups of water to boil in a small saucepan. Pour the boiling water into the empty pan on the bottom rack and set the loaf onto the middle rack. Bake until an instant-read thermometer inserted at an angle from the short end just above the pan rim into the center of the loaf reads 195°, 40-50 minutes. Remove the bread from the pan, transfer to a wire rack and cool to room temperature. Slice and serve.