Sunday, December 19, 2010

Chocolate Malted Cupcake w/ Dark Chocolate Frosting


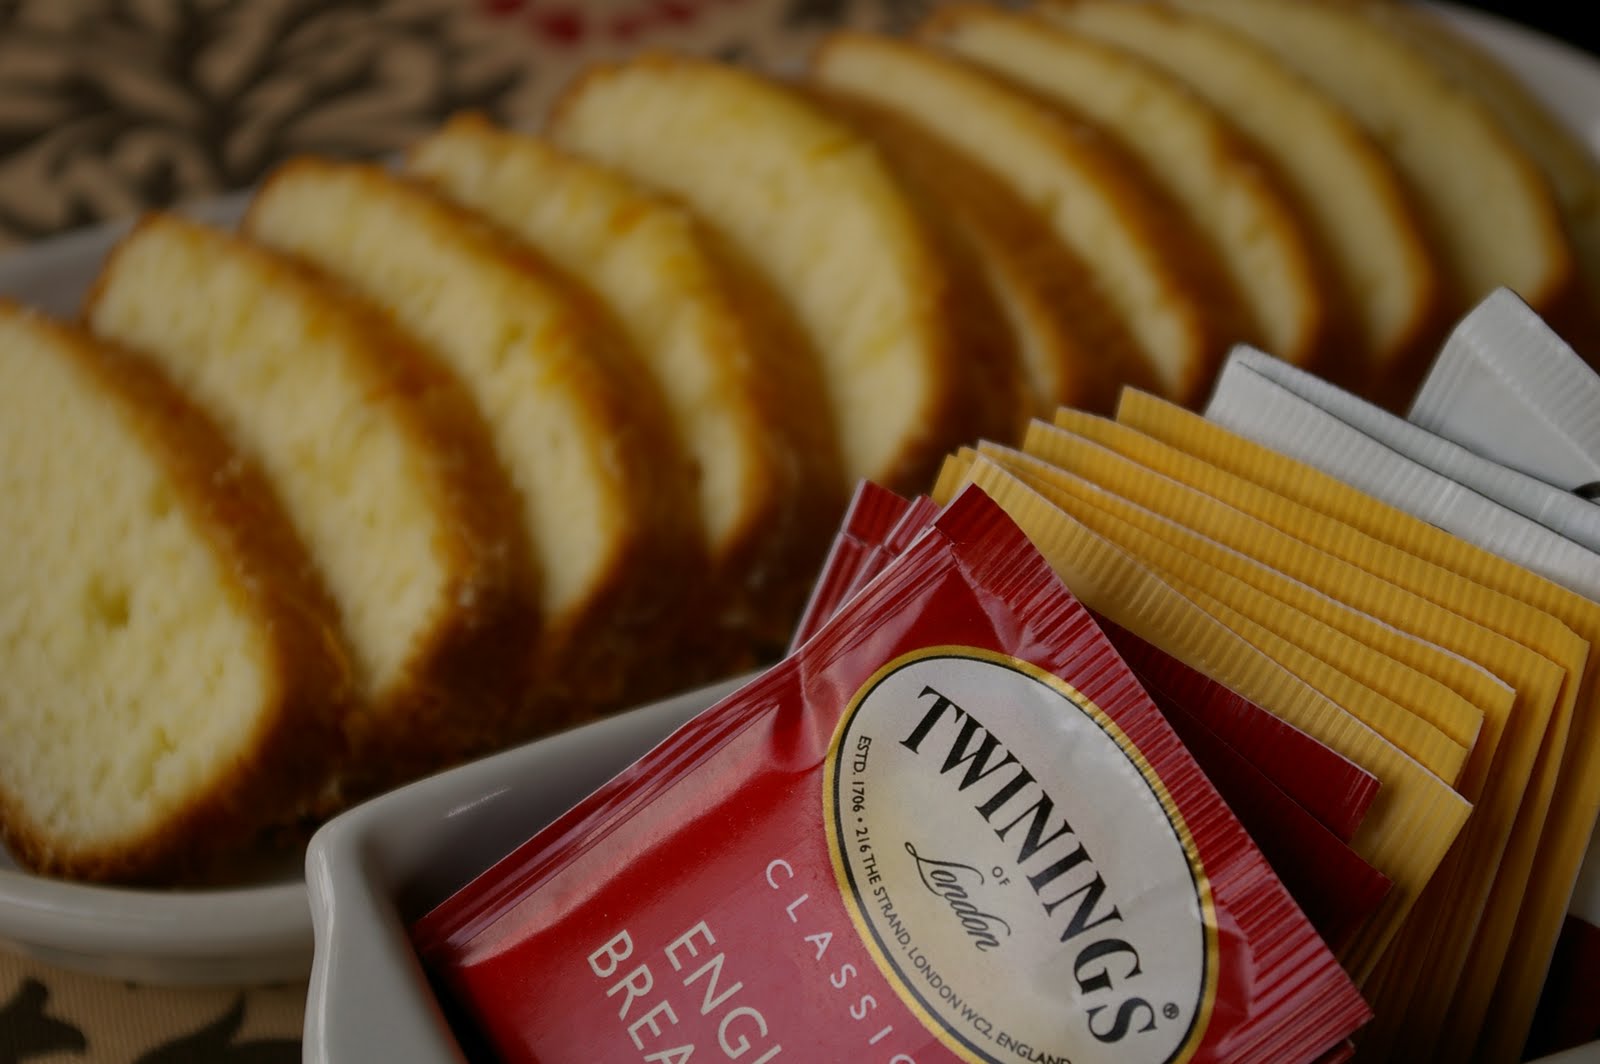
Every year our work donates to United Way and kicks off the donation season with a United Way auction.  Different clients, organizations, and people within our work donate items to be a part of the silent / live auctions.  This year I decided to donate two dozen cupcakes for 12 months.  Well...

it ended up raising $120 for United Way.  I was excited to find out that Susan, a girl I work with, won my cupcake package.  It makes my life super easy because I can just bring the cupcakes to the building I work at (all of us usually work at different client sites).

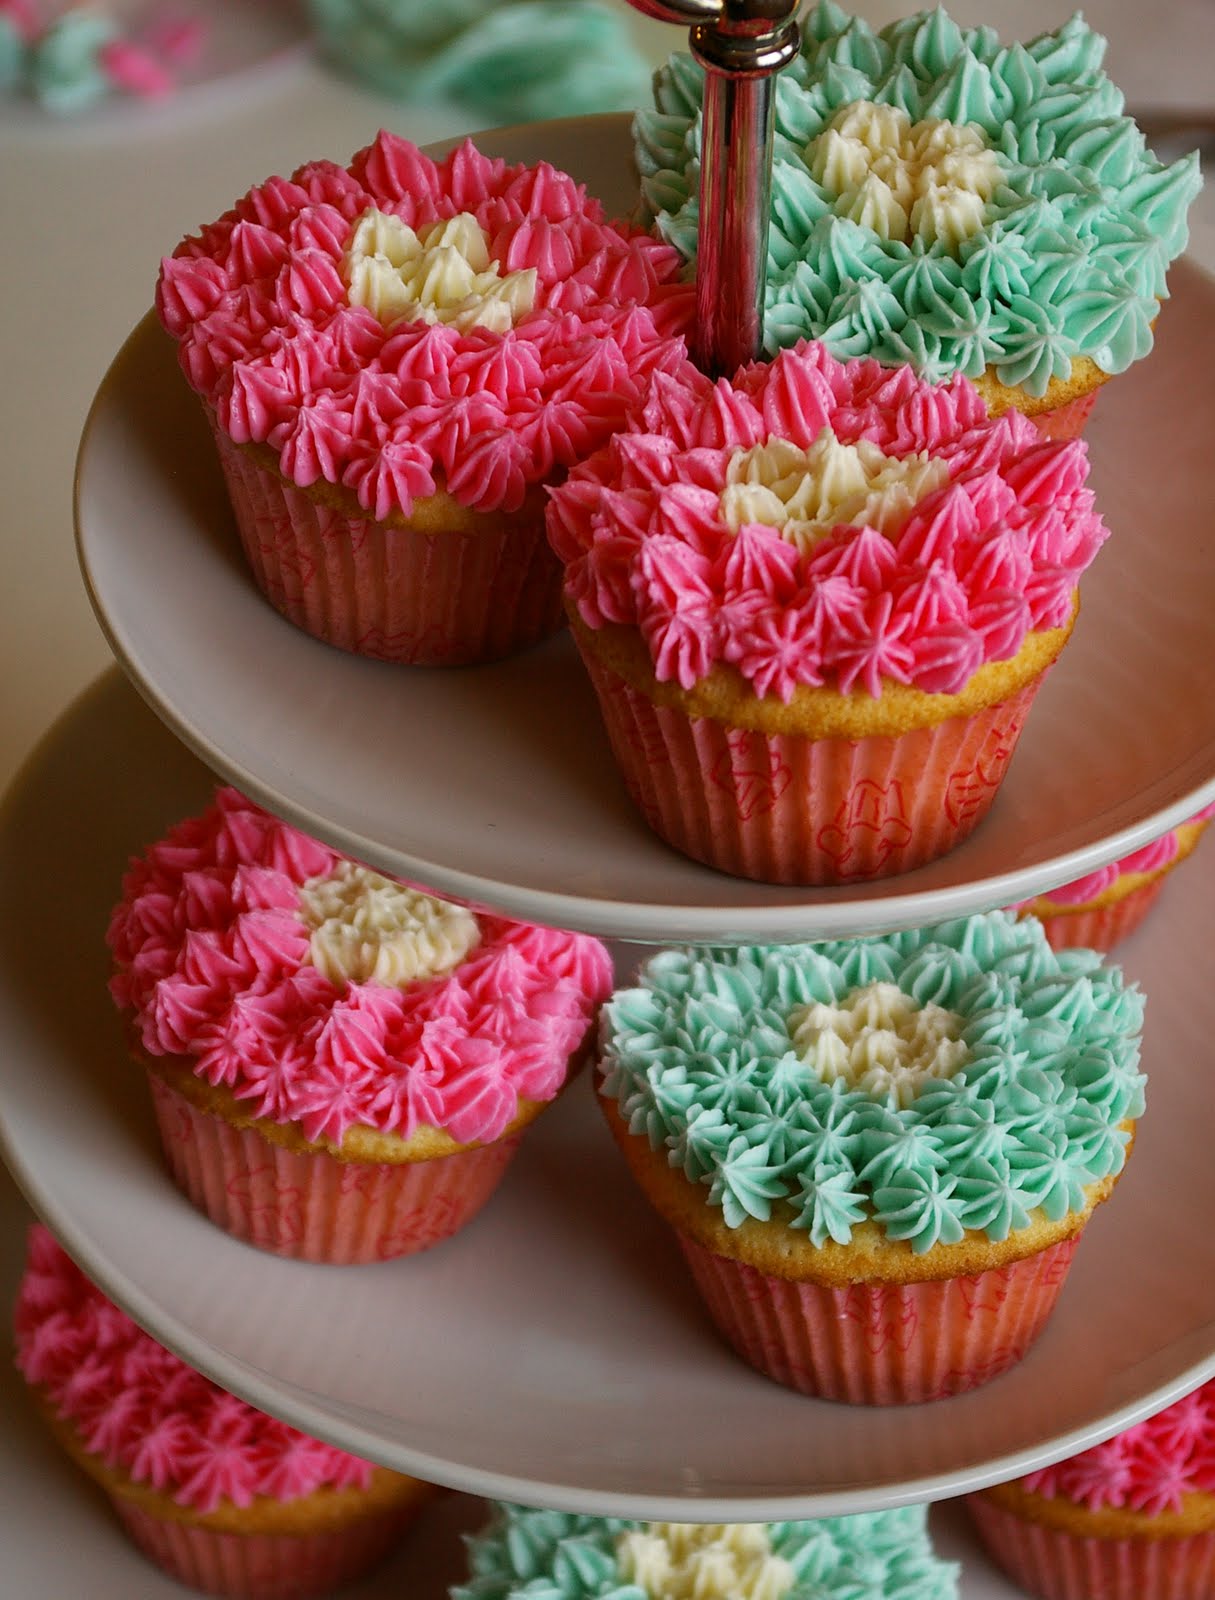
So here are the December cupcakes -- Malted Chocolate Cupcakes with Dark Chocolate Frosting out of Martha Stewart's Cupcakes cookbook.  Her recipe calls for vanilla frosting, but Susan and I are both suckers for Chocolate Frosting.  These cupcakes tasted great and retained their moisture, the only downside was I couldn't taste the malted milk powder (you know, that malt milkshake taste?).  I'm not sure if it's because I used chocolate frosting or what.  Regardless they tasted great and Susan was pleased.

My recommendation is to stick with the Devil's Food cupcakes if you want the chocolate taste.  The malted powder didn't stand out like the recipe claimed and the ingredient can be hard to find (usually it can be found in specialty stores like Central Market).

Chocolate Malted Cupcakes
Martha Stewart's Cupcakes cookbook
Makes roughly 28

Ingredients:

2 1/4 cups all purpose flour
3/4 cup Dutch process cocoa powdered
1/2 cup granulated sugar
3/4 cup light brown sugar (packed)
1 1/2 tsp baking soda
1/2 tsp salt
1 cup milk
1 1/4 cup malted milk powder
1 cup vegetable oil
3 large eggs, room temperature
1 cup sour cream, room temperature
1 tsp vanilla extract

Directions:
With oven preheated @ 350 Degrees F.

1.Whisk together flour, cocoa, sugars, baking soda & salt. in another bowl, whisk together milk and malted milk powder until dissolve.

2.With mixer on Med- High, beat flour mixture, milk mixture and oil until combined. Add eggs one at a time, beating until well incorporated. Add sour cream and vanilla. Beat until just combined.

3.Divide batter evenly among lined cups, filled half way. Bake, rotating tins halfway through, until until cake tester comes out clean or baked about 20 minutes.

Monday, October 4, 2010

Mushroom and Sausage Ragu with Polenta


This budget friendly meal has become an instant favorite in our household.  If I haven't told you already, you need to go buy the October 2010 issue of Cooking Light magazine. 

This dish is relatively quick to make and Kyle loves it because it's really hearty and filling (and only 428 calories/serving).

Mushroom and Sausage Ragu with Polenta
Cooking Light, October 2010 Issue, pg. 210

Cook the polenta while the ragu simmers so everything will be ready and hot at the same time.  Use mild sausage, if you prefer.

1 1/2 tablespoons olive oil, divided
8 ounces hot turkey Italian sausage
1/2 cup chopped onion
1 pound cremini mushrooms, sliced
2 large garlic cloves, minced
1/4 teaspoon kosher salt, divided
1 (14.5 ounce) can no-salt-added diced tomatoes, undrained
2 1/2 cups fat-free, lower-sodium chicken broth
1 1/2 cups water
1 cup uncooked polenta
4 ounces 1/3-less-fat cream cheese
1 tablespoon butter

1. Heat a skillet over medium-high heat.  Add 1 1/2 teaspoons oil to pan; swirl to coat.  Remove sausage from casings.  Add sausage to pan; saute 3 minutes or until browned, stirring to crumble.  Remove sausage from pan.

2. Add 1 tablespoon oil to pan; swirl to coat.  Add onion; saute 3 minutes, stirring occasionally.  Add mushrooms; saute 4 minutes, stirring occasionally.  Add garlic; saute 1 minute, stirring constantly.  Stir in sausage, 1/8 teaspoon salt, and tomatoes; bring to a simmer.  Reduce heat to medium; simmer gently for 15 minutes.

3. Bring broth and 1 1/2 cups water to a boil in a medium saucepan.  Add polenta, stirring well.  Reduce heat to medium, and simmer 20 minutes or until thick, stirring occasionally.  Stir in remaining 1/8 teaspoon salt, cheese, and butter.  Serve with sausage mixture.

Yield: 4 servings (serving size: 1 cup polenta and 1 cup ragu)

Nutrition Info:

Calories: 428
Fat: 18.7g (sat 8.4g, mono 8.5g, poly 1.4g)
Protein: 18.2g
Carb: 46g
Fiber: 4.6g
Chol: 53mg
Iron: 3.3mg
Sodium: 821mg
Calcium: 74mg

Enjoy!!

Saturday, September 25, 2010

Buffalo Chicken Panini

Kyle and I were both starving tonight and I had no idea what I was going to make for dinner.  I didn't feel like making anything an almost opted for Chinese delivery or pizza delivery or anything delivery for that matter.  Luckily, I came to my senses and decided to make this Buffalo Chicken Panini from the October 2010 issue of Cooking Light.  Kyle had mentioned wanting something spicy so this was the perfect meal.  It also rolls in at 402 calories per sandwich which is even better. 
My only recommendation is to add more hot sauce (if you like it spicy).  The amount in the recipe gave it the buffalo wing taste, but didn't have any heat.

Buffalo Chicken Panini
Cooking Light, October 2010 Issue, pg. 206
1/4 cup hot pepper sauce, divided
1 pound chicken breast tenders
1/2 cup (2 ounces) crumbled blue cheese
6 tablespoons canola mayonnaise
8 (1-ounce) slices white our sourdough bread
Directions: Preheat broiler; coat broiler pan with cooking spray.  Combine 2 tablespoons hot sauce and chicken in a medium bowl , tossing to coat.  Arrange chicken in a single layer on broiler pan; broil 4 minutes on each side or until done.  Place chicken in a bowl; toss with remaining 2 tablespoons sauce.  Combine cheese and mayonnaise.  Spread 3 tablespoons cheese mixture on each of 4 bread slices; top each with one-forth of the cooked chicken and 1 bread slice.  Heat a grill pan over medium-high heat.  Coat pan with cooking spray.  Arrange two sandwiches in pan.  Place a cast-iron or heavy skillet on top of the sandwiches, press gently.  Cook for 3 minutes on each side or until bread is toasted (leave skillet on sandwiches while they cook).  Repeat procedure with remaining 2 sandwiches.  Yield: 4 servings (serving size: 1 sandwich).
Nutrition Info:
Calories: 402
Fat: 16.2g (sat 4.9g, mono 6g, poly 3.5g)
Protein: 32.4g
Carb: 29.1g
Fiber: 3g
Chol: 75mg
Iron: 0.8mg
Sodium: 724mg
Calcium: 100mg

Thursday, September 23, 2010

Loaded Potato Soup

In the October 2010 issue of Cooking Light I stumbled on this recipe for Loaded Potato Soup.  I was instantly intrigued with this "healthy" soup that had cheese and bacon nestled on top (yum! I love bacon).  I was surprised to find that 1 1/4 cups of this soup is only 325 calories.  It's the perfect amount for a light meal, especially if you serve it with some chicken breast and a salad.

I decided to make it the following day for dinner and let's just say it got RAVE reviews from my husband.  I also really enjoyed it.  Kyle said it makes him feel like taking a nap.  I say it makes me feel like curling up in front of the fireplace to watch a movie on a cold night.  Did I mention I'm excited for Fall?

Another bonus is that it only takes about 30 minutes to make and it's a fairly simple recipe.  If you try this out please let me know.  It tastes like a super delicious loaded baked potato, but has all the goodness a hot cup of soup can provide.  Did I mention it has bacon? ;)

Loaded Potato Soup
Cooking Light, October 2010 Issue, pg. 42

4 (6-ounce) red potatoes
2 teaspoons olive oil
1/2 cup prechopped onion
1 1/4 cups fat-free, lower-sodium chicken broth
3 tablespoons flour
2 cups 1% low-fat milk, divided
1/4 cup reduced-fat sour cream
1/2 teaspoon salt
1/4 teaspoon pepper
3 bacon slices, halved
1/3 cups shredded cheddar cheese
4 teaspoons thinly sliced green onions

1. Pierce potatoes with a fork (no need to wash).  Microwave on HIGH 13 minutes or until tender.  Cut in half; cool slightly.
2. While potatoes cook, heat oil in a saucepan over medium-high heat.  Add onion; saute 3 minutes.  Add broth.  Combine flour and 1/2 cup milk; add to pan with 1 1/2 cups milk.  Bring to a boil; stir often.  Cook 1 minute.  Remove from heat; stir in sour cream, salt, and pepper.
3. Arrange bacon on a paper towel on a microwave-safe plate.  Cover with a paper towel; microwave on HIGH for 4 minutes.  Crumble bacon.
4. Discard potato skins.  Coarsely mash potatoes into soup.  Top with cheese, green onions, and bacon.

Yield: 4 servings (serving size: about 1 1/4 cups)

Nutrition Info:

Calories: 325
Fat: 11.1g (sat 5.2g, mono 4.5g, poly 0.8g)
Protein: 13.2g
Carb: 43.8g
Fiber: 3g
Chol: 27mg
Iron: 1.3mg
Sodium: 670mg
Calcium: 261mg

Recommendations:
~Watch the milk mixture carefully!! When it starts to boil, if it gets too hot it may boil over your saucepan (if it's not big enough) before the 1 minute mark.
~Make a double batch.  Although 325 calories is great per serving, if you don't pair it with a protein and side vegetable you may still be hungry.  Doubling the batch will ensure there is plenty to go around (just make sure you watch the calories, you know, if you're watching that kind of thing!)
~Freeze it! The night before you want to have it for dinner, pull it out of the freezer and stick it in the fridge.
~For you photographers out there... I watched a video at Fro Knows Best that talked about using flash and how to make your images look less flat.  I'm always stuck with the problem of photographing food at night during the winter, so this was a great tip!  Instead of keeping your DSLR on auto and using the pop up flash, change it to Shutter priority and decrease your shutter speed to 1/10 or 1/8 (instead of 1/100 or 1/200 that auto typically chooses).  Then, while keeping your flash popped, take the picture.  The flash with freeze whatever you're taking a picture of while leaving the shutter open to account for the ambient light (see the yellow light in the background of my photo from the overhead kitchen lights?).  I tested it out this morning when I had poor lighting and I was happy with the results!  Thanks Fro!

Sunday, August 22, 2010

Tiramisu Cupcakes

I've been on quite the cupcake baking spree this last week!  Danielle, a friend of mine, is turning 30 this week so we decided to throw a birthday party for her.  We went with an Italian theme for dinner so I recommended making Italian sodas and I brought Tiramisu cupcakes.

This is a Martha Stewart recipe out of the Martha Stewart Cupcakes cookbook.  I'm never disappointed with a Martha Stewart recipe ~ everyone who tried these cupcakes (the girls at the party, my friends husband, Kyle, my in-laws, and my friend Lindsay) all loved them.  They have a rich coffee flavor and the mascarpone frosting is delicious.  The recipe was also simple to make (but does call for some special ingredients like a vanilla bean, mascarpone cheese, and marsala wine for the coffee-marsala sauce that gets basted over the top). 

If you're going to have an Italian-themed party, or if you just love Tiramisu, I recommend giving this recipe a try.


To check out this recipe, click here (will take you to the recipe on Martha's website).

Enjoy!

Friday, August 20, 2010

German Chocolate Cupcakes

I decided to make Martha Stewart's German Chocolate cupcakes for my dad's birthday last week.  This is hands down his favorite cake.  Last year I made him a three layered German Chocolate cake from scratch.  It was my first time ever making a layered cake and I've got to say, it was quite fun!  I went to go find a link to the cake on my blog and realized that was one recipe I never found time to blog (how lame).  Here is a picture I found to give you and idea of what I made:


(next time I'll try to get a picture with a slice missing that way you can see all of the layers)

These cupcakes were fairly simple to make and tasted d.e.l.i.c.i.o.u.s.  Everyone in my family who tried them thought they were pretty good (at least, that's what they told me!).  I love how they look like a mini two-layered cake. 


If you like coconut and pecans - you seriously need to give this recipe a try.  Your tummy will thank you for it.

The recipe can be found on the Martha Stewart website here.

Happy cupcake baking, photographing, blogging, and eating (the best part)!

Wednesday, July 21, 2010

Garvey's Organic Traditional Scones

When I was at QFC the other day I decided to look at the scone mixes.  I've only made scones from scratch once and was wondering what the box mixes were like.  I decided to pick up Garvey's Organic Traditional Scones - it cost around $3.50. 

Last night I had a friend over for tea and scones.  She is super picky with box mixes (because they usually don't taste as good as homemade) so I wanted to see what she thought about the mix I picked up.  I ended up making the lemon variation and let me tell you we both thought they were delicious!  They were simple to make and came out of the oven golden brown and flaky (what more could you ask for?!).


Doesn't it look scrumptious?

Saturday, July 17, 2010

Quick Coconut Ice Cream


I can't believe it's already mid-July and I've only made one homemade ice cream recipe!!  I've had my ice cream maker attachment (for the KitchenAid mixer) since Christmas and the only ice cream I've made is the Double Chocolate Mint Chip (it was also healthy).  This was the first ice cream recipe I made that called for heavy cream and let me tell you, it was deliciousIt was also super easy to make!

I was craving a cool, coconut treat so I searched for coconut ice cream recipes.  I stumbled across a lot of recipes that called for a list of around 10 ingredients of which one of the ingredients was coconut cream (not coconut milk).  Does anyone know where to find this??  I wasn't in the mood to search for specialty food items so I kept looking.  I then came across this site.  I was instantly excited for the recipe because it calls for four ingredients!  I left out the saffron, but I'm sure it adds a really great touch to it (like I said... wasn't in the mood for finding specialty items).  This coconut ice cream I made calls for three ingredients: heavy cream, unsweetened coconut milk, and granulated sugar.

I hope you give this recipe a try, it is delicious!  You could really fancy it up and serve on top of some sort of cookie, shortbread, cake, etc. and top with toasted unsweetened flaked coconut.  Yum.

Quick Coconut Ice Cream Recipe
*adapted from Delicious Days

2/3 cup heavy cream
1 cup coconut milk (I used unsweetened)
1/4 cup granulated white sugar

In a medium saucepan, bring all ingredients to a boil (right when it starts to really boil it will look foamy and start to rise in the pan.  If you're not watching enough it may boil over so watch closely because when it really starts to go you need to go the next step).

Reduce heat (to about medium low, a 2.5 on my gas stove dial) and simmer gently for 10 minutes, stirring occasionally.  Remove from heat and chill the mixture thoroughly (I place the pan in a wooden bowl with ice to submerge it.  Then I stick the whole thing in the fridge.  This process usually cools the mixture in about 30 minutes.).

Once chilled, freeze in your ice cream maker according to the instructions (in the KitchenAid mixer it took approximately 20 minutes).

Some Tips/Notes:
-Make sure the ice cream maker attachment bowl is completely chilled and frozen prior to churning the ice cream (at least 12 hours).  I leave it in my freezer at all times so I can have ice cream quickly ;)
-Some ice creams require an additional "riping" period in the freezer.  This ice cream sets up really nicely in the churn process and is thick enough to scoop and eat right away.  If you freeze the ice cream after it does get harder and may require some time to soften gently prior to scooping.

Thursday, July 15, 2010

Grilled Goodness

I was in quite the grilling mood last night so on my way home from work I stopped by the store and picked up some steak, a sweet potato, yellow squash, zucchini, eggplant, and some white mushrooms. 

I simply drizzled all of the veggies in EVOO, salt, and pepper, and grilled over medium heat until soft.  This meal was so delicious!!

What have you been grilling??

Sunday, June 27, 2010

Cupcakes Cupcakes Cupcakes


 My mom hand picked the cupcakes she wanted me to make for her birthday this year.  She was looking through my Martha Stewart Cupcakes cookbook and decided to select the Coconut Cupcakes.  Here is a link to another post that includes the recipe.  The only difference between the last post and this one was in the last post I made the cupcakes with Coconut Swiss Meringue Buttercream frosting and this time I stayed true to the recipe and made a Coconut 7 minute frosting.

I actually preferred the cupcake with the 7 minute frosting because it's so light and fluffy and delicious.  I also topped this cupcake with the flaked unsweetened coconut I found in the bulk food section at Central Market instead of using sweetened flaked coconut from the store.

In addition to making some Coconut cupcakes for my mom's birthday, I was also happy to help make 70 cupcakes for my niece's graduation (congrats Bree!!).

My mom really wanted to go with a smiley face theme so here is how they turned out...


Thanks to my momma for the cupcake stand and for making all of the cute graduation hats.  She made all of them with a "L" for Lynnwood High School and laminated them too so they would stay nice sitting in the frosting.  I made french vanilla cupcakes with lemon American buttercream frosting and chocolate cupcakes with banana American buttercream frosting.  Thanks momma and Shelby for all of your help frosting and decorating!!


 Aren't their little faces so cute!!


MMmmm Mmmm delicious!!

Happy cupcake making everyone!!

~Alyssa

Wednesday, June 16, 2010

Good Pounds

Wow these photos and this post has been sitting in my blog buffer for over a month now!  I made this delicious pound cake in early May for a dinner party with some friends.  Ok seriously, don't judge me, but I made it from a box mix - I KNOW!  It's actually really good and if you're looking for something you can quickly throw together I recommend this.  It's a Betty Crocker Pound Cake mix.  After baking mine I decided to make an orange glaze with some orange juice, powdered sugar, and some orange zest.  Just poke holes in the top with a fork, drizzle glaze, and enjoy!


Tastes the best when enjoyed with a good cup of tea!

Happy Baking everyone!

Monday, June 14, 2010

Woof Woof Woof

Last year for Christmas Kyle bought me a silicon University of Washington "W" cake pan and last Friday I finally got a chance to use it!!  A close friend of ours had a guys night to celebrate his birthday so I thought this would be the perfect dessert to bring (they are Husky fans like us.. go Dawgs!!).


Here is a picture of the white cake hot out of the oven.  Unfortunately, after I let it cool and turned it out on a dish the center was not quite cooked enough and a little gooey.  I was pretty bummed, but decided to stop by the store, purchase another cake mix (I know.. I never use mixes, but I did this time) and try again.  This time I split the batch in half.  Half went to making the most delicious, moist cupcakes, and the other half I tinted with purple food coloring, added mini chocolate chips and baked in the silicon mold.  Here is how everything turned out...


The white cupcakes with Chocolate Buttercream frosting, yellow and purple sprinkles, and a piped "W".


The frosting was so yummy.  I used the Buttercream frosting off of the Wilton's site.


The finished display after turning out the "W" cake and frosting the cupcakes.  I can't wait to use this again for tailgating this fall!  Woof woof woof!

Friday, May 28, 2010

Favorite Cream Scone


I love scones.  Love them!  The funny thing is... I've never made them before - I KNOW!!!  So I decided to ask my friend Katrina for some recipes.  I knew she would be the perfect one to ask because she has a lot of books on scones and tea party type goodies - yum!

This is her favorite Cream Scone recipe.  What can I say... it is SO simple.  Especially if you have a food processor (or pastry blender, but I used my food processor).  I love how in a matter of minutes you can have scones hot out of the oven.  I also love how unlike cupcakes, you use the butter, eggs, and cream straight out of the refrigerator - no waiting for room temperature my friends!  That got me all excited!

Ok, so the picture above is one cream scone served with a little amount of apricot preserves and some homemade whipped cream - so delicious.  I'm going to make another batch of these soon and add some frozen organic blackberries.

She also sent me a Simple Sweet Scones recipe that I also plan to try.  Oh the possibilities!

Favorite Cream Scones
from Katrina

2 cups all-purpose flour
2 teaspoons baking powder
1 tablespoon sugar
1/2 teaspoon salt
6 tablespoons butter (right from the fridge! ~ it's actually really important that it's cold)
2 eggs, well beaten (also right from the fridge)
1/2 cup heavy cream (ya baby!)
1/2 teaspoon vanilla

1. Preheat oven to 400 degrees F.
2. Lightly butter a cookie sheet (or use a Silpat like I do).
3. Mix flour, baking powder, sugar, and salt in a bowl (I just added everything to my food processor).
4. Work in butter with a pastry blender until the mixture resembles coarse meal (I cut the butter up into cubes, added to the food processor and pulsed until it resembled coarse meal).
5. Add eggs, cream, and vanilla and stir until blended (I added to the food processor and hand stirred with a spoon until it was together enough to take out - why dirty another bowl???)
6. Turn out onto a lightly floured board and knead for about 1 minute.
7. Roll dough about 3/4 inch thick and cut into rectangles or form into a circle and score 6-8 wedges (I just used my hands to flatten into a circle and cut 8 wedges).
8. Place on a cookie sheet and bake for 8-10 minutes being careful not to over cook (at 9 minutes it wasn't long enough so I ended up needing to leave them in for ~11 min.).

Lastly... enjoy!!! I like to have my scones with some fresh whipped cream, sometimes with whipped cream and preserves, and always tea.. yum!!  Kyle also really liked them too with just whipped cream.

Off to make the next batch...

Monday, May 17, 2010

Grilled Caprese Sandwich


Grilled Caprese Sandwich.  So simple, yet so delicious.  I decided to make these sandwiches the other day as a late lunch before serving some friends dinner.  This recipe is super easy!  Take a french baguette and slice it in 4 inch long pieces, then cut the pieces in half, and drizzle with olive oil.  Top one of the halves with basil leaves (I used Genovese), tomato slices, and fresh mozzarella.  Heat up a grill pan, panini press, or in my case a George Foreman and grill until the crust is golden and the mozzarella just starts to melt.  Would be good with Creamy Basil Tomato soup.

Enjoy! This is the ultimate fresh tasting sandwich.

Monday, May 10, 2010

White Cupcakes with Tinted Buttercream Peaks


I made these White Cupcakes with tinted Swiss Meringue Buttercream frosting on Saturday for a Mother's Day Tea event my church had.  I was a table hostess and my theme was cupcakes - this was my centerpiece.  Most people really like the cake batter in this recipe.  It's super light and fluffy (thanks to the stiff egg whites folded in).  I got mixed reviews about the frosting.  It's not super sweet like an American Buttercream that has a lot of powdered sugar.  A SMB does not have any powdered sugar.  It has egg whites, butter, vanilla, and some granulated white sugar.  It's very simple and light.  In my opinion it pairs well with intensely flavored cupcakes.  This cake batter was also lighter in taste so I can understand why some did not think there was enough flavor in the frosting.  One way to make this frosting sweeter (without switching to American buttercream) is to add 4oz. of melted white or dark chocolate.  I've done this before and it tastes great.

Here is the recipe (from Martha Stewart's Cupcakes cookbook):

White Cupcakes with Pastel Buttercream Peaks (or in my case, tinted - I went dark on the tints)
Pg. 154

3 1/4 cups sifted cake flour (not self-rising)
1 1/2 tablespoons baking powder
1/4 teaspoon salt
1 tablespoon pure vanilla extract
1 cup plus 2 tablespoons milk
1/2 cup plus 6 tablespoons (1 3/4 sticks) unsalted butter, room temperature
1 3/4 cups sugar
5 large egg whites, room temperature
Swiss Meringue Buttercream Frosting
Gel-paste food colors

1. Preheat oven to 350 F.  Line standard muffin tins with paper liners.  Sift together cake flour, baking powder, and salt.  Stir vanilla into milk.

2. With an electric mixer on medium-high speed, cream butter until smooth.  Gradually add sugar, beating until pale and fluffy.  Reduce speed to low.  Add flour mixture in three batches, alternating with two additions of milk, and beating until just combined after each.

3. In another bowl, with an electric mixer on medium speed, whisk the egg whites until stiff peaks form (do not overmix).  Fold one third of the egg whites into the batter to lighten.  Gently fold the remaining whites in two batches.

4. Divide batter evenly among lined cups, filling each three-quarters full.  Firmly tap the tins once on the countertop to release any air bubbles.  Bake, rotating tins halfway through, until a cake tester inserted in center comes out clean, 18 to 20 minutes.  Transfer tins to wire racks to cool 10 minutes; turn out cupcakes onto racks and let cool completely.  Cupcakes can be stored overnight at room temperature, or frozn up to 2 months in airtight containers.

5. Divide buttercream into four portions; leave one untinted and tint remaining three to desired colors.  Place each portion in a pastry bag fitted with a coupler.  Using a small open-star tip (#20), pipe peaks: Squeeze gently while lifting the tip, the release at the halfway point, and draw up until icing forms a point.  Starting with untinted buttercream, pipe a single peak in the center of each cupcake, then pipe more peaks in a ring around it.  Switch to tinted buttercream; pipe rings of peaks around the plain, until you reach the edge.  Refrigerate 30 minutes to allow frosting to set.  Cupcakes can be refrigerated up to 3 days in airtight containers; bring to room temperature before serving.

Swiss Meringue Buttercream Frosting
Pg.304

Recipe can be found on Martha Stewart's website, here. Please note this recipe is double the amount needed for the recipe above.

Enjoy!

Wednesday, April 7, 2010

Red Velvet Cupcakes


I made these Martha Stewart Red Velvet Cupcakes on Monday night for a client's birthday.  A coworker and I decorated his office with 90+ balloons, streamers, and a Happy Birthday sign.  I picked this recipe because I really like red velvet cake.  The one thing that was weird with this recipe is that it called for baking soda and vinegar.  I'm not sure what it did to the cupcake (maybe made it more air-y??), but it tasted pretty good.  I was disappointed that it didn't turn out super red.  It looks more brown and that bummed me out, but it still tasted good.  I love love love this cream cheese frosting.  It tasted great on this cupcake, but it also pairs well with pumpkin spice and the banana pecan cupcakes. 

Red Velvet Cupcakes
Martha Stewart Cupcakes (pg. 30)
Makes 24

2 1/2 cups cake flour (not self-rising), sifted
2 tablespoons unsweetened Dutch-process cocoa powder
1 teaspoon salt
1 1/2 cups sugar
1 1/2 cups vegetable oil
2 large eggs, room temperature
1/2 teaspoon red gel-paste food color
1 teaspoon pure vanilla extract
1 cup buttermilk
1 1/2 teaspoons baking soda
2 teaspoons distilled white vinegar
Cream-Cheese Frosting

1. Preheat oven to 350 F.  Line standard muffin tins with paper liners. Whisk together cake flour, cocoa, and salt.

2. With an electric mixer on medium-high speed, whisk together sugar and oil until combined.  Add eggs, one at a time, beating until each is incorporated, scraping down sides of bowl as needed.  Mix in food color and vanilla.

3. Reduce speed to low.  Add flour mixture in three batches, alternating with two additions of buttermilk, and whisking well after each.  Stir together the baking soda and vinegar in a small bowl (it will foam); add mixture to batter, and mix on medium speed 10 seconds.

4. Divide batter evenly among lined cups, filling each three-quarters full.  Bake, rotating tins halfway through, until a cake tester inserted in centers comes out clean, about 20 minutes.  Transfer tins to wire racks to cool completely before removing cupcakes.  Cupcakes can be stored overnight at room temperature, or frozen up to 2 months, in airtight containers.

5. To finish, use a small offset spatula to spread cupcakes with frosting.  Refrigerate up to 3 days in airtight containers; bring to room temperature before serving.

Cream Cheese Frosting
Makes 4 cups

1 cup (2 sticks) unsalted butter, room temperature
12 ounces cream cheese, room temperature
1 pound (4 cups) confectioners' sugar, sifted
3/4 teaspoon pure vanilla extract

With an electric mixer on medium-high speed, beat butter and cream cheese until fluffy, 2 to 3 minutes.  Reduce speed to low.  Add sugar, 1/2 cup at a time, and then vanilla, and mix until smooth and combined, scraping down sides of bowl as needed.  If not using immediately, frosting can be refrigerated up to 3 days in an airtight container; before using, bring to room temperature, and beat on low speed until smooth again.

Sunday, April 4, 2010

Yellow Buttermilk Cupcakes with Dark Chocolate Frosting


I love baking cupcakes.  Anytime I can find an excuse to make them, I usually do.  This weekend I made some cupcakes for my brother-in-law because he's celebrating his 24th birthday this week, Saturday actually - Happy Birthday Kevbro!

His favorite cake is yellow cake with chocolate frosting.  His mom usually makes this for him every year, but this year I offered to make cupcakes.  I knew instantly I wanted to make his favorite - yellow cake with chocolate frosting. I already had frosting made from the Chocolate Chip Cupcakes I made last week, so I was good there.  All I needed to do was buy some buttermilk for the cake batter.

This yellow buttermilk cake batter is pretty good and would pair nicely with any frosting - chocolate, fluffy vanilla, maybe a caramel swiss meringue buttercream or a white chocolate swiss meringue buttercream.  It's the perfect base.  I would also be a good cake batter for decorative cupcakes.

If you try these let me know what you think! Happy cupcake baking!

Yellow Buttermilk Cupcakes
Martha Stewart Cupcakes Cookbook (pg. 26)
Makes 36

3 cups cake flour (not self-rising)
1 1/2 cups all-purpose flour
3/4 teaspoon baking soda
2 1/4 teaspoons baking powder
1 1/2 teaspoons coarse salt
1 cup plus 2 tablespoons (2 1/4 sticks) unsalted butter, room temperature
2 1/4 cups sugar
5 large whole eggs plus 3 egg yolks, room temperature
2 cups buttermilk, room temperature
2 teaspoons pure vanilla extract
Dark Chocolate Frosting (recipe in this post)

1. Preheat oven to 350 F.  Line standard muffin tins with paper liners.  Sift together both flours, baking soda, baking powder, and salt.

2. With an electric mixer on medium-high speed, cream butter and sugar until pale and fluffy.  Reduce speed to medium.  Add whole eggs, one at a time, beating until each is incorporated, scraping down sides of bowl as needed.  Add yolks, and beat until thoroughly combined.  Reduce speed to low.  Add flour mixture in three batches, alternating with two additions of buttermilk, and beating until combined after each.  Beat in vanilla.

3. Divide batter evenly among lined cups, filling each three-quarters full.  Bake, rotating tins halfway through (this is only if you are baking two 12 cup tins at once, if you are only baking one tin, then you don't need to rotate), until cupcakes spring back when lightly touched and a cake tester (aka a toothpick) inserted into the centers comes out clean, about 20 minutes.  Transfer tins to wire racks to cool 10 minutes; turn out cupcakes onto racks and let cool completely.  Cupcakes can be stored overnight at room temperature, or frozen up to 2 months, in airtight containers.

4. To finish, use a small offset spatula to spread cupcakes with frosting.  Refrigerate up to 3 days in airtight containers; bring to room temperature and, if desired, decorate with sprinkles before serving.

Saturday, April 3, 2010

Oatmeal Coconut Scotchies

Gross.  Not the cookies, but having to dig through the garbage this morning (luckily I didn't have to go far) to recover this recipe.  This last week I was craving cookies and it was one of my client's 40th birthday so I thought.. why not bake some cookies.  I didn't have much on hand, but managed to have all the ingredients for this Oatmeal Scotchies recipe on the back of a Nestle TollHouse Butterscotch morsels bag.  I used to make coconut butterscotch biscotti so that is why I had them on hand.  I was excited to try this oatmeal cookie recipe because I already knew I liked the coconut and butterscotch pairing.  Trust me.  If you haven't tried this combo.. it is SO good.  The recipe on the back of the morsel bag did not include coconut, it was something I added at the last minute, but these would be equally as good without it.  This recipe is now a favorite of mine because of the flavor and the texture.  This cookie has a slight chew on the outside (like a corner brownie..mmm) and is soft on the inside.  It melts in your mouth (because of that butter.. aren't your proud of me Paula?!). 

I definitely recommend baking these for yourself and for others as they will love you for it.

Oatmeal Scotchies
Nestle TollHouse
Makes about 4 dozen cookies (or about 3 batches of 9 large cookies)

1 1/4 cups all-purpose flour
1 tsp. baking soda
1/2 tsp. ground cinnamon
1/2 tsp. salt
1 cup (2 sticks) butter or margarine, softened (butter all the way baby)
3/4 cup granulated sugar
3/4 cup packed brown sugar
2 large eggs
1 tsp. vanilla extract or grated peel of 1 orange (I used vanilla extract)
3 cups quick or old-fashioned oats
1 2/3 cups (11-oz. pkg.) Nestle TollHouse Butterscotch Flavored Morsels
1/3 cup sweetened coconut (something I added)

Preheat oven to 375.

Combine flour, baking soda, cinnamon, and salt in small bowl.  Beat butter, granulated sugar, brown sugar, eggs, and vanilla extract in a large mixer bowl.  Gradually beat in flour mixture.  Stir in oats and morsels.  Drop by the rounded tablespoon onto ungreased baking sheets. I rolled into a 1 1/2 in. ball and flattened will my palms so it looked like a little flat disk about 1/2 in. thick.  I could fit 9 of these on a standard baking sheet.  I also used a Sil Pat.

Bake for 7 to 8 minutes for chewy cookies; 9 to 10 minutes for crisp cookies.  Cool on baking sheets for 2 minutes; remove to wire racks to cool completely. I cooked mine for about 9-10 minutes (when making 9 to a batch).  I definitely recommend leaving them on the cookie sheet for 2 minutes.  I left them until they cooled completely and they removed nicely (largely because it was on a Sil Pat).

Sunday, March 28, 2010

Three Cheese Tortellini with Basil

I rarely buy pre-made fresh pasta, but one day it was on sale so I bought some and threw the pack in the freezer. I enjoy eating stuffed pasta tossed in olive oil and topped with fresh parmesan, but this time I wanted something more. I decided to defrost 1/4 cup of tomato paste from the freezer and add 2 tablespoons of milk to thin it out and give it a creamier taste. Once the pasta was cooked, I drained and tossed the tortellini with the tomato mixture. I plated just over a cup of the pasta and topped it with some fresh julienned basil and grated parmesan. For being a quick, simple, throw together meal, I liked it. If I were to make it again, I would probably thin it with some more milk. The basil definitely gave it that Italian touch.

Three Cheese Tortellini with Basil
Recipe By Me
Serves 2

1 container of fresh three cheese tortellini pasta (about 9 oz.)
1/4 cup of tomato paste
2 tablespoons of milk
1/4 cup of fresh grated parmesan, plus more for garnish
6 large basil leaves, julienned

1. Add pasta to a pot of boiling water and cook for 7-9 minutes (or according to the directions on the package).

2. While the pasta is cooking, mix the tomato paste with the milk and heat in the microwave for 30 seconds.  Julienne the basil leaves and grate the parmesan.

3. Drain the cooked pasta and add back to the pot.  Toss with the tomato mixture and grated parmesan.  Plate half of the mixture on a plate and garnish with more parmesan and julienned basil.

Enjoy!

Saturday, March 27, 2010

Chocolate Chip Cupcakes

Lately I've been on a chocolate kick.  I had a bag of Dove milk chocolates at my desk all week a couple of weeks back and finally finished them when I received another bag from my secret prayer partner (who turned out to be Nancy).  So last week I finished that bag.  At least I was smart enough to bring them to bible study and spread the wealth - I still ate too much.  Outside of my Dove milk chocolate obsession, I've also been eating semi-sweet chocolate chips.  I know, I know.  Who on earth eats chocolate chips straight out of the bag to curb their chocolate addiction? Well, me of course.  So, when I stumbled across Martha's Chocolate Chip Cupcakes recipe in my Martha Stewart's Cupcakes cookbook, I couldn't resist.  I ended up bring these cupcakes to Kyle's work and everyone who tried one loved them.  The texture and flavor of these cupcakes remind me of chocolate chip banana bread (minus the banana).  It's a crumbly, bread type consistency.  I prefer a moist, chewy cupcake, but all in all, it was good.

Chocolate Chip Cupcakes
Martha Stewart's Cupcakes, pg. 22

Makes 30

3 1/4 cups plus 1 tablespoon sifted cake flour (not self-rising)
4 1/2 teaspoons baking powder
1/4 teaspoon salt
1 tablespoon pure vanilla extract
1 cup plus 2 tablespoons milk
1/2 cup plus 6 tablespoons (1 3/4 sticks) unsalted butter, room temperature
1 3/4 cups sugar
5 large egg whites, room temperature
2 cups (12 ounces) semisweet chocolate chips

1. Preheat oven to 350.  Line standard muffin tins with paper liners.  Whisk together 3 1/4 cups cake flour, the baking powder, and salt.  Stir the vanilla into the milk to combine.

2. With an electric mixer on medium-high speed, cream butter until smooth.  Adding the sugar in a steady stream, beat until pale and fluffy.  Reduce speed to low.  Add flour mixture in three batches, alternating with two additions of milk mixture, and beating until just combined after each.

3. In another bowl, with an electric mixer on medium speed (I did medium-high), whisk the egg whites until stiff peaks form (do not overmix).  Fold one-third of the egg whites into the batter to lighten. Gently fold in the remaining whites until just combined.  Toss chocolate chips with remaining tablespoon cake flour, and gently fold into batter.

4. Divide batter evenly among lined cups, filling each three-quarters full.  Bake, rotating tins halfway through, until a cake tester inserted in the centers comes out clean and the tops are springy to the touch, about 22 minutes.  Transfer tins to wire racks to cool completely before removing cupcakes.  Cupcakes can be stored overnight at room temperature, or frozen up to 2 months, in airtight containers.

5. To finish, use a small offset spatula to spread cupcakes with frosting.  Refrigerate up to 3 days in airtight containers; bring to room temperature and, if desired, decorate with sprinkles before serving.

Dark Chocolate Frosting
pg. 302

1/2 cup plus 1 tablespoon unsweetened Dutch-process cocoa powder
1/2 cup plus 1 tablespoon boiling water
2 1/4 cups (4 1/2 sticks) unsalted butter, room temperature
3/4 cup confectioner's sugar, sifted
1/4 teaspoon salt
1 1/2 pounds best-quality semi-sweet chocolate, melted and cooled (see page 323)

Combine cocoa and the boiling water, stirring until cocoa has dissolved.  With an electric mixer on medium-high speed, beat butter, confectioner's sugar, and salt until pale and fluffy.  Reduce speed to low.  Add melted and cooled chocolate, beating until combined and scraping down sides of bowl as needed.  Beat in the cocoa mixture.  If not using immediately, frosting can be refrigerated up to 5 days, or frozen up to 1 month, in an airtight container.  Before using, bring to room temperature, and beat on low speed until smooth again.

Thursday, March 25, 2010

Mango Shrimp Kebabs

Who doesn't love kebabs?! I mean come on.  It's the ideal meal on a nice, sunset afternoon... riiiight?!

Well, I thought so.  After getting home from work last Tuesday I decided to make these kebabs because I saw them in the April issue of Cooking Light and well, they looked, fabulous - and easy.

There are only a handful of ingredients.  Shrimp, red bell peppers, mangoes, red onion, limes, and some s&p.  I told you this recipe is easy.

It's also suprisingly delicous if you like simple flavors.  I love simple flavors.  Shrimp always tastes amazing to me no matter how you prepare it, you get subtle sweetness from the grilled mangoes and bell pepper, and the lime juice on top rounds out the meal nicely.  Did I mention you get two full kebabs for only 277 calories? Awesome.

Mango Shrimp Kebabs
Cooking Light, April Issue, pg. 185

1 1/2 lbs. large peeled and deveined shrimp
1 large red bell peppers, cut into 1-inch pieces
2 mangoes, peeled and cut into 1-inch cubes
1 small red onion, cut into 1-inch pieces
2 limes, cut into wedges

Prepare grill to medium-high heat.  Sprinkle shrimp evenly with 1/2 teaspoon salt and 1/8 teaspoon freshy ground black pepper.  Thread shrimp, bell pepper pieces, mango cubes, and onion pieces alternately onto each of the 8 (12-inch) skewers.  Place skewers on a grill rack coated with cooking spray; grill 2 minutes on each side or until shrimp are done.  Squeeze lime juice from lime wedges over kebabs.

Yield: 4 servings (serving size: 2 skewers)

Calories: 277
Fat: 3.3g (sat 0.7g, mono 0.5g, poly 1.2g)
Protein: 35.8g
Carb: 27.1g
Fiber: 4.2g
Chol: 259mg
Iron: 4.5mg
Sodium: 551mg
Calcium: 109mg

Wednesday, March 24, 2010

Tart & Tangy Bulgar Salad

I found this recipe in the April edition of Cooking Light magazine on page 202.  I always like to take these sort of recipes to work for lunch during the week because they are easy to make and they are the type of recipes that get better the longer they sit in the fridge.

One caveat, you need to enjoy green olives.  If you don't like green olives, I recommend swapping with kalamata olives.  In addition to the green olives, there is lime juice, salt, basil, garlic, red onion, and tomatoes.

This recipe would also be really good with chicken to add some more protein.

Tart and Tangy Bulgar Salad

1 cup uncooked bulgar
1 cup boiling water
2 tablespoons olive oil
2 tablespoons lime juice
1/2 teaspoon salt
8 large basil leaves, finely chopped
1 garlic clove, minced
1/4 cup chopped red onion
12 large olives, sliced (about 3/4 cup)
1 large tomato, chopped
Lime wedges (optional)

1. Combine bulgar and boiling water in a large bowl.  Cover and let stand for 45 minutes.
2. Combine oil and next 4 ingredients (through garlic) in a small bowl, stirring with a whisk until combined.  Add oil mixture, onion, olives, and tomato to bulgar; toss well.  Garnish with lime wedges, if desired. 

Yield: 4 servings (serving size: about 1 cup)

Nutritional Info:

Calories: 210
Fat: 8.7g (sat 1.2g, mono 6g, poly 1.1g)
Protein: 5g
Carb: 31g
Fiber: 7.6g
Chol: 0mg
Iron: 1.5mg
Sodium: 420mg
Calcium: 35mg

If you make this, let me know what you think.  Enjoy!

Thursday, March 18, 2010

Roast Chicken with Balsamic Bell Peppers

This recipe will knock your socks off it's that good.  I found this little gem of a recipe in my bi-monthly Cooking Light magazine in the January/February edition.  I like to try new recipes all time.  Kyle likes to too, but he could eat the same things day in and day out.  Not me.  I like to eat different lunches and dinners throughout the week.  We ate cobb salads and steak salads for two weeks straight and now I don't even want to think about them! 

So back to this recipe.  It's fantastic.  The flavor is so delicious, rich, and sweet all at the same time.  The chicken gets a rub made of salt, crushed fennel seeds, black pepper, garlic powder, and dried oregano.  If you've never had fennel seeds, or fennel before, you need to try it.  It has a licorice flavor and usually I don't care for it, but it suprisingly goes well in this dish.

The bell pepper mixture is also full of flavor.  You saute red and yellow bell peppers, shallots, and rosemary in a skillet over medium high heat.  After 3 minutes you add the chicken stock and simmer for 5 minutes.  After it simmers, kick up the heat to medium high, add the balsamic, remaining salt, and remaining pepper and cook for 3 minutes.  Serve the chicken with 3/4 cup of the bell pepper mixture on top.

The full recipe (with calories) is included below. Enjoy..!


Roast Chicken with Balsamic Bell Pepper
Cooking Light, January/February, pg. 78

Serves 4

3/4 teaspoon salt, divided
3/4 teaspoon fennel seeds, crushed
1/2 teaspoon black pepper, divided
1/4 teaspoon garlic powder
1/4 teaspoon dried oregano
4 (6-ounce) skinless, boneless chicken breasts
2 tablespoons olive oil, divided
Cooking Spray
2 cups thinly sliced red bell pepper
1 cup thinly sliced yellow bell pepper
1/2 cup thinly sliced shallots (about 1 large)
1 1/2 teaspoons chopped fresh rosemary
1 cup fat-free, less-sodium chicken broth
1 tablespoon balsamic vinegar

1. Preheat oven to 450.
2. Heat a large skillet over medium-high heat.  Combine 1/2 teaspoon salt, fennel seeds, 1/4 teaspoon black pepper, garlic powder, and oregano.  Brush chicken with 1 1/2 teaspoons oil; sprinkle spice rub over chicken.  Add 1 1/2 teaspoons oil to pan.  Add chicken; cook 3 minutes or until browned.  Turn chicken over; cook 1 minute.  Arrange chicken in an 11 x 7-inch baking dish coated with cooking spray.  Bake at 450 for 10 minutes or until done.
3. Heat remaining olive oil over medium-high heat.  Add bell peppers, shallots, and rosemary; saute 3 minutes.  Stir in broth, scraping pan to loosen browned bits.  Reduce heat; simmer 5 minutes.  Increase heat to medium-high.  Stir in vinegar, 1/4 teaspoon salt, and 1/4 teaspoon pepper; cook 3 minutes, stirring frequently.  Serve bell peppers mixture over chicken.

Serving size: 1 breast half and about 1/2 cup bell pepper mixture

Nutrition Information:
Calories: 282
Fat: 11g (sat 2.1g, mono 6.4g, poly 1.7g)
Protein: 35.9g
Carb: 8.8g
Fiber: 1.9g
Chol: 94mg
Iron: 2mg
Sodium: 644mg
Calcium: 38mg

Sunday, March 14, 2010

Pasta Salad with Salmon, Peas, and Herbs

Ok so I know the picture doesn't look that appetizing, but this pasta is really good I assure you.  You have to like salmon though, and whole wheat pasta, oh.. and peas (which I usually hate, but they are suprisingly good in this dish).

I tried this Ellie Krieger recipe out for the first time yesterday.  I needed to bring a salad to the Women's Spring Luncheon at our church and wanted it to be healthy so I opted for this one. 

The dressing is super rich and creamy - it's made with greek yogurt, lemon juice, mayonnaise, lemon zest, dill, and salt and pepper.  It's also super simple (ok, did I really just say super simple? Sandra Lee says that about a bazillion times during her show Semi Homemade and I can't stand it!!!).  I'll just say it's simple, better yet, so easy (you can find this recipe in Ellie Krieger's cookbook, So Easy).  Once the pasta is cooked and cooled, you toss with the dressing, some herbs, the peas, and salmon and you're good to go. 

I will definitely make this pasta salad again and potentially even bring it to work. 

Katrina, thank you for the compliments on this salad.  As promised, here is the recipe:

Pasta Salad with Salmon, Peas, and Herbs
Ellie Krieger, So Easy

Makes 4 Servings

2/3 cup plain Greek-style nonfat yogurt
3 tablespoons fresh lemon juice
3 tablespoons mayonnaise
2 teaspoons finely grated lemon zest
1 teaspoon minced fresh dill, or 2 teaspoons dried
1/2 teaspoon salt
1/2 teaspoon freshly ground black pepper
1 (14-ounce) can wild red salmon, drained, skinned and boned, cut into chunks (I suggest buying the salmon in a pouch, if they have that, already skinned and with the bones taken out b/c this took the most time)
1 10-ounce package frozen peas, defrosted
1/2 pound bowtie or corkscrew pasta, cooked according to package directions and cooled (I substituted with organic whole-wheat pasta, farfalle, and it tasted really good - more fiber and better for you)
2 scallions (white and green parts), minced (about 1/4 cup)
8 cups chopped red-leaf lettuce

Combine the yogurt, lemon juice, mayonnaise, lemon zest, dill, salt and pepper in a bowl and whisk to incorporate.  Add the salmon, peas, pasta, and scallions and toss to incorporate.  The pasta salad will keep up to 2 days in an airtight container in the refrigerator.

To serve, mound 2 cups of the lettuce onto each plate or into to-go containers and scoop about 1 3/4 cups of the pasta salad on top.

Friday, March 12, 2010

Sweet Things

Wow it's been forever - good to finally be back!  Although I haven't posted in a while that doesn't mean I haven't been cooking or baking.  I've actually been cooking up a storm.  I try at least 2 or 3 new recipes a week to keep things interesting.  Some recipes I've tried recently are Blue Cheese Stuffed Chicken Breast, Garlic Basil Shrimp, Shrimp Fra Diavlo, Shitake and Sweet Pea Risotto, and many others.  This weekend I'm going to try Ellie Krieger's Beef and Taco Salad as well as a Balsamic Chicken with Sauteed Bell Peppers.

On to much sweeter things...

like Stuffed French Toast.  To be quite honest, I wasn't thrilled about the flavor of this dish.  It's a healthy recipe so it doesn't have any syrup. None. Nada. Zilch.  I usually don't like a lot of syrup anyway, but this dish would benefit from a tsp. of pure maple syrup drizzled on top.  The chocolate and strawberry combination was fabulous though (who doesn't love chocolate and strawberries together?!) and I will definitely try this again just with a touch of syrup.


Another recipe I tried was this White Cake Cupcakes with White Chocolate Swiss Meringue Buttercream.  A mouthful to say, but so delicious and light and fluffy and yum.  This reminds me somewhat of the cakes you can buy in the store, but there is something to be said about using Swiss Meringue Buttercream instead of an American Buttercream that's much sweeter.  I added a few drops of yellow food coloring to give it a fluffly yellow color and added multi-colored sprinkles for a fun touch.  I served these at a church function at our house (for the junior / senior high school kids) and they loved them.


The last recipe I'm going to include is by far one of my favorites.  It's a Devil's Food Cupcake with Chocolate Ganache glaze. Yum.  I've also made the cupcakes with a chocolate Swiss Meringue Buttercream and those were good as well, a little less chocolatey in flavor.  You definitely need to give this recipe a try.  Sour cream keeps this cupcake super moist and flavorful.  The ganache frosting is time consuming to make so I made a glaze instead and it tasted great.


If you would like any of these recipes just email me at alyssa.talley@gmail.com and I will send the info. 

Happy Friday Everyone!

Monday, February 15, 2010

MSC: S'mores Cupcakes

This month Mary Ann from Meet Me in the Kitchen chose Martha Stewart's S'mores Cupcakes.  If you haven't stopped by Mary Ann's blog you must do so!  She updates often and has a lot of good recipes. 

I made these cupcakes late last Wednesday night in preparation for a 5-hour workshop on Thursday at work.  I was happy to find that everyone really enjoyed them.  A couple of people even mentioned it was the best cupcake they ever had.  Maybe it's just me and I'm super critical of my own baking, but I didn't think they tasted that great.  The cupcake batter did taste like graham crackers and the frosting was practically a marshmallow so it definitely resembled a s'more, but it wasn't my thing.  I would rather have swiss meringue buttercream frosting and a light fluffly white or chocolate cake batter for my cupcakes.  It was also quite labor intensive, but a pretty presentation.  Thanks Mary Ann for picking this month's recipe - Kyle really liked them :)

Wednesday, January 27, 2010

CEiMB: Emerald Stir Fry with Beef

Can you believe it? After almost six months of being a part of the Craving Ellie in My Belly group, it was finally my chance to pick the recipe!  Of course, like any other foodie blogger, I was eager to choose one that most everyone would like.  I hope I did a good job.  I've been eyeing the Emerald Stir Fry with Beef for a while now.  All of the fresh vegetables looked so good that I had to pick it.  I was so disappointed after making it the first time for my parents and husband.  I know think it didn't turn out so well because I over cooked the beef.  Although Ellie recommended so many minutes (I think it was 3 or something) I ended up cooking it longer because the meat was still pink and it freaked me out a little.  I'm used to eating my steaks medium rare, but because I cut the steaks into little strips there was pink on the outside (which is what freaked me out).  In the future I would probably grill the steak separately and slice after on a 45 degree angle against the grain.  Other than the texture of the steak, the flavor was good and I really enjoyed the vegetable blend.  As you can tell from the picture... I decided to make the recipe again!!  This time I substituted shrimp for the steak and added seasame seeds for a garnish.  The verdict.... awesome!  I love this recipe with the tender shrimp and this version instantly became a staple dinner at our house.  It's full of flavor and lower in calories than the traditional stir fry.  Shrimp is also lean, low in calories and high in protein.  It's the perfect substitute for steak and I didn't have to worry about how tender it would be because once they turn pink they are done. 

Unfortunately I don't have Ellie's cookbook in front of me because I'm in Dallas for the week on a business trip, but you can find the recipe here.

To make my version of the recipe, thaw the shrimp in cold water.  Peel and marinate the peeled shrimp in the sauce mixture (OJ, white wine, soy sauce, rice vinegar, and water).  Let the shrimp take a swim, if you will, in the marinade while you stir fry the veggies.  After the veggies have done their frying for 3 or 4 minutes, add the shrimp with the marinade and cook for an additional 3 or 4 minutes until the shrimp is pink and the vegetables are tender, but still have some bite.  Add the cornstarch mixture and let sit on low heat for a few minutes to thicken.  Serve over brown rice. Mmmm.. enjoy!

Thanks to all my CEiMBer's who took the time to cook with me this week.  I really hope you liked the recipe and let me know how yours turned out / if you had substitutes of your own.

Happy Blogging!

Alyssa